
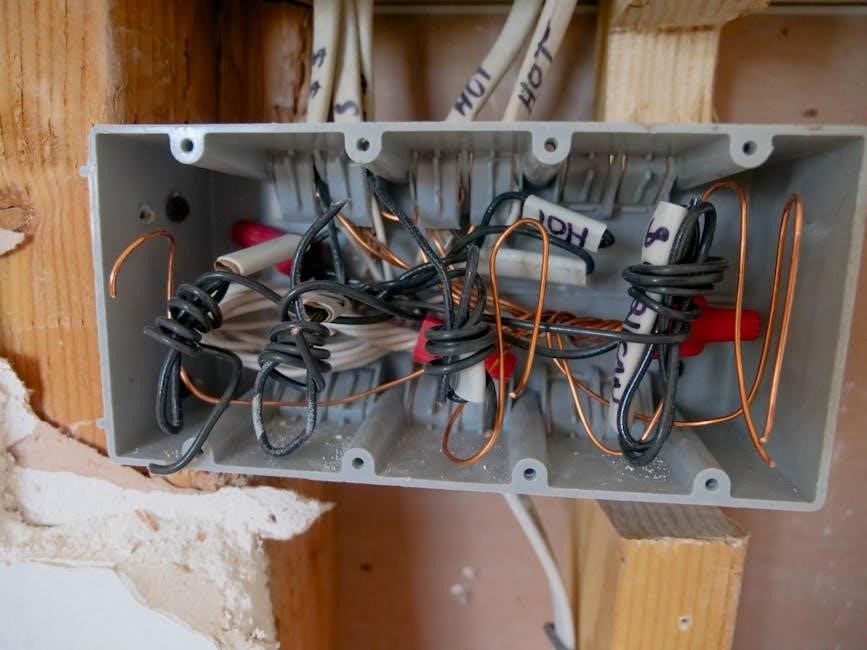
An electric scooter wiring diagram serves as a visual guide for understanding the electrical connections and components․ It helps owners troubleshoot, maintain, and customize their scooters safely and effectively․
1․1 Understanding the Basics of Electric Scooter Wiring
Understanding the basics of electric scooter wiring is essential for owners to maintain, troubleshoot, and customize their vehicles․ The wiring system connects key components like the motor, controller, battery, and throttle, ensuring proper communication and power distribution․ A wiring diagram acts as a roadmap, illustrating how these parts are linked․ It helps identify the flow of electrical current and the purpose of each wire․ Familiarizing yourself with the diagram allows you to diagnose issues, such as faulty connections or short circuits․ Proper wiring ensures safety, efficiency, and optimal performance․ By grasping these fundamentals, owners can address common problems and perform routine maintenance confidently․ This knowledge is crucial for both novice and experienced users, as it empowers them to take control of their scooter’s electrical system effectively․
1․2 Importance of a Wiring Diagram for Owners
A wiring diagram is a vital resource for electric scooter owners, providing a clear visual representation of the vehicle’s electrical system․ It helps users understand how components like the motor, controller, battery, and throttle are interconnected․ This diagram is essential for troubleshooting issues, such as faulty wires or connections, and ensures safe and effective repairs․ By referencing the diagram, owners can identify potential hazards, like short circuits, and take preventive measures․ It also empowers users to perform routine maintenance and customize their scooters with confidence․ A wiring diagram acts as a guide, making complex electrical systems more accessible and reducing the risk of costly mistakes․ For both novice and experienced owners, it is an indispensable tool for maintaining and enhancing their scooter’s performance and longevity․
1․3 Safety Precautions When Working with Electrical Systems
When working with the electrical systems of an electric scooter, it is crucial to follow safety precautions to avoid hazards․ Always disconnect the battery before starting any work to prevent unexpected power surges or short circuits․ Use insulated tools and wear protective gear, such as gloves and safety glasses, to minimize the risk of injury․ Ensure the scooter is placed on a stable, flat surface and avoid working in wet conditions․ Never tamper with live wires or components without proper knowledge, as this can lead to electrical shocks or fires․ Additionally, refer to the wiring diagram to understand the system thoroughly before making any modifications․ Proper grounding and circuit checks should be performed to ensure all components are functioning safely․ Remember, safety should always be the top priority when handling electrical systems to prevent accidents and ensure a smooth repair or maintenance process․

Key Components of an Electric Scooter
Key components include the motor, controller, battery, and throttle․ These parts work together to power and control the scooter, ensuring efficient operation and safety․ Understanding each component is essential for proper maintenance and troubleshooting․

2․1 Motor and Controller Overview
The motor is the heart of the electric scooter, converting electrical energy into mechanical power․ It is typically a DC brush or brushless type, designed for efficiency and durability․ The controller, often paired with the motor, regulates power flow and ensures smooth operation․ Together, they manage speed, torque, and responsiveness, adapting to rider input from the throttle․ Proper wiring between the motor and controller is critical for optimal performance and safety․ Regular inspection and maintenance of these components are recommended to prevent malfunctions and extend the scooter’s lifespan․ Understanding their roles and connections is essential for any owner looking to troubleshoot or upgrade their electric scooter․
2;2 Battery and Charging System
The battery is the power source of an electric scooter, typically consisting of a rechargeable lithium-ion or lead-acid pack․ It stores electrical energy that powers the motor and other components․ The charging system includes a charger and wiring that connect to the battery, ensuring safe and efficient energy replenishment․ Proper charging is critical to maintain battery health and longevity․ Most scooters use a 36V or 48V system, with chargers specifically designed for these voltages․ Overcharging or using the wrong charger can damage the battery, so following the manufacturer’s guidelines is essential․ Regular inspection of the battery terminals and wiring is recommended to prevent issues like short circuits or power loss․ A well-maintained battery and charging system ensure reliable performance and extend the scooter’s operational life․
2․3 Throttle and Accelerator Mechanism
The throttle and accelerator mechanism in an electric scooter are crucial for controlling speed․ The throttle, typically a lever or button, sends signals to the controller, which adjusts the motor’s power output․ This mechanism ensures smooth acceleration and deceleration․ Modern scooters use sensors, like hall sensors, to detect the throttle’s position, enhancing precision․ The accelerator mechanism is connected to the controller via wiring, allowing seamless communication․ Proper functioning of this system is vital for both performance and safety․ Understanding this mechanism, as shown in the wiring diagram, helps owners troubleshoot issues like inconsistent acceleration․ Regular inspection of connections and sensors is recommended to maintain optimal performance and prevent malfunctions․

Voltage Systems in Electric Scooters
Electric scooters operate on various voltage systems, with 36V and 48V being the most common․ Higher voltage systems deliver more power and longer range, while lower voltages are ideal for lighter use․
3․1 36-Volt Electric Scooter Wiring Diagram
A 36-volt electric scooter wiring diagram provides a detailed visual representation of the electrical connections specific to 36V systems․ It highlights the precise placement of wires, components, and connections, ensuring users can accurately understand and maintain their scooter’s electrical system․ This diagram is essential for troubleshooting common issues, such as faulty wires or connections, and for performing repairs safely․ It also serves as a guide for customizing or upgrading components like the motor, controller, or battery․ By following the diagram, users can identify key components, such as the battery pack, motor, controller, and throttle, and ensure they are connected correctly․ Regular reference to the wiring diagram helps prevent electrical malfunctions and ensures optimal performance․ It is a crucial resource for both DIY enthusiasts and professional technicians working on 36V electric scooters․
3․2 48-Volt Electric Scooter Wiring Diagram
A 48-volt electric scooter wiring diagram is a detailed schematic that outlines the electrical connections for 48V systems․ It is particularly useful for models with higher power requirements, offering a clearer understanding of the wiring layout for components like the motor, controller, and battery․ This diagram is essential for troubleshooting and maintaining 48V scooters, as it provides insights into the complex connections and voltage-specific requirements․ Users can identify key components, such as the 800W controller or hall sensors, and ensure proper wiring to avoid malfunctions․ The 48V system typically supports higher torque and performance, making the wiring diagram crucial for safe and effective customization or repairs․ By referencing this diagram, owners can diagnose issues like short circuits or faulty connections and perform maintenance confidently․ It is a vital tool for optimizing the performance and longevity of a 48V electric scooter․
3․3 Differences Between Voltage Systems
The primary differences between 36V and 48V electric scooter systems lie in performance, range, and component compatibility․ A 36V system is ideal for lighter scooters, offering a balance between power and efficiency, while a 48V system delivers higher torque and speed, making it suitable for heavier models or terrains․ The wiring diagrams for these systems vary, as the 48V requires more robust components and connections to handle increased voltage․ Additionally, charging times and battery configurations differ, with 48V systems often needing advanced controllers and motors․ Understanding these distinctions is crucial for proper maintenance and upgrades, ensuring compatibility and safety․ Always refer to the specific voltage diagram to avoid electrical mismatches and performance issues․ This knowledge helps owners optimize their scooter’s capabilities while maintaining reliability and longevity․ Voltage selection significantly impacts the overall riding experience and functionality․

Troubleshooting Common Electrical Issues
Troubleshooting common electrical issues in electric scooters involves checking the battery, connections, and motor․ Use the wiring diagram to trace faults and reset the system․ Identify and replace faulty components to ensure safety and performance․
4․1 Identifying Faulty Wires and Connections
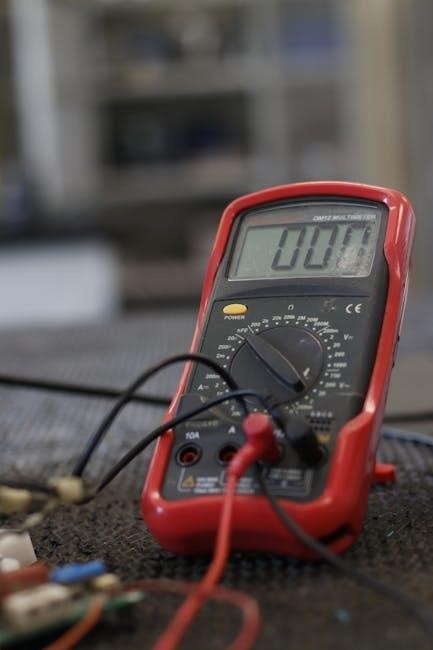
Identifying faulty wires and connections is crucial for maintaining your electric scooter’s performance․ Start by inspecting wires for visible signs of wear, corrosion, or damage․ Use a multimeter to test for continuity and voltage drops․ Check connections to ensure they are secure and free from rust․ Refer to the wiring diagram to trace the flow of electricity and pinpoint where issues may occur․ If a wire is damaged, clean or replace it immediately to prevent short circuits․ For connections, tighten loose terminals or replace corroded ones․ Always disconnect the battery before performing any checks to avoid electrical shocks․ Regular inspections can help prevent malfunctions and ensure your scooter operates safely and efficiently․ By addressing faulty wires and connections promptly, you can extend the lifespan of your electric scooter and maintain optimal functionality․
4․2 Resetting the Electrical System
Resetting the electrical system of your electric scooter can resolve various issues such as faulty sensors or power surges; Start by disconnecting the battery to ensure no power flows through the system․ Use a multimeter to verify that no voltage remains․ Next, locate the reset button or switch, typically found near the controller or battery․ Press and hold it for a few seconds to reset the system․ If your scooter doesn’t have a reset button, consult the wiring diagram to identify the fuse or circuit breaker․ Replace or reset it as needed․ Reconnect the battery and test the scooter to ensure proper function․ Always wear protective gloves and ensure the scooter is on a level surface during this process․ If issues persist, consult a professional or refer to the owner’s manual for further guidance․
4․3 Common Causes of Electrical Malfunctions
Electrical malfunctions in electric scooters often stem from loose or corroded connections, which can disrupt power flow․ Overloaded circuits due to added accessories may also cause issues․ Physical damage to wires or components can lead to short circuits or open connections․ Manufacturing defects in wiring or components can result in recurring problems․ Extreme temperatures may affect battery performance and electrical stability․ Blown fuses or tripped circuit breakers are common due to overcurrent or short circuits․ Improper charging practices, such as using the wrong charger, can damage the electrical system․ Regular inspections of wires, connections, and components are essential to identify and address these issues early․ Replacing damaged wires and ensuring secure connections can prevent further malfunctions․ Keeping the scooter clean and dry helps avoid corrosion and moisture-related problems․ Always use the correct charger and follow the owner’s manual guidelines to maintain optimal performance․

Maintenance and Upkeep of Wiring
Regular maintenance ensures optimal performance and safety․ Clean and inspect wires for damage, wear, or corrosion․ Replace any damaged components promptly․ Use appropriate tools and protect wiring from moisture and heat․
5․1 Cleaning and Inspecting Wires
Cleaning and inspecting wires are essential for maintaining your electric scooter’s electrical system․ Start by disconnecting the battery to ensure safety․ Use a soft-bristle brush or a clean cloth to remove dirt, dust, or debris from the wires and connections․ Inspect each wire for signs of damage, such as fraying, cuts, or burn marks․ Check connectors for corrosion or loose terminals․ If you find any damage, replace the affected wires immediately․ Use a multimeter to test for continuity and ensure there are no short circuits․ Regular inspection helps prevent electrical failures and ensures optimal performance․ Always refer to your owner’s manual for specific guidance on handling your scooter’s wiring system․ Keep the wiring clean and dry to avoid moisture-related issues․ This simple maintenance step can significantly extend the lifespan of your electric scooter’s electrical components․
5․2 Replacing Damaged or Worn-Out Wires
Replacing damaged or worn-out wires is crucial for ensuring the reliability and safety of your electric scooter․ Begin by disconnecting the battery to avoid any accidental power surges․ Identify the faulty wire using your wiring diagram as a guide․ Carefully remove the damaged wire, noting its connections and routing․ Install a replacement wire of the same gauge and type, securing it with proper connectors and insulation․ Reconnect the wire according to the diagram, ensuring all terminals are tightly fastened․ Test the scooter’s electrical system to confirm everything functions correctly․ If unsure, consult a professional to avoid further damage or safety risks․ Regularly inspecting and replacing worn wires prevents electrical failures and enhances your scooter’s performance․ Always follow the manufacturer’s guidelines for wire replacement to maintain your scooter’s integrity and longevity․
5․3 Regular Maintenance Schedule
A regular maintenance schedule is essential to ensure the longevity and optimal performance of your electric scooter’s wiring system․ Start by inspecting the wires and connections monthly, looking for signs of wear, corrosion, or damage․ Clean the terminals and connectors using a soft brush or alcohol wipes to prevent dirt buildup․ Check the battery terminals for secure connections and charge the battery according to the manufacturer’s instructions․ Test the throttle and brakes to ensure proper electrical responses․ Before each ride, perform a quick visual inspection of the wiring and components․ Replace any worn-out insulation or frayed wires immediately․ Schedule a professional inspection every 6 months or after extensive use․ By following this routine, you can prevent electrical failures, enhance safety, and maintain your scooter’s efficiency․ Regular upkeep ensures a smooth and reliable riding experience․ Always refer to your owner’s manual for specific maintenance recommendations tailored to your scooter model․

Safety Guidelines for Handling Electrical Systems
Always disconnect the battery before working on electrical systems․ Use insulated tools to prevent shocks․ Avoid wet conditions and ensure proper ventilation․ Refer to the owner’s manual for specific safety protocols․
6․1 Proper Use of Tools and Equipment
When working with electrical systems, it is essential to use the correct tools and equipment to ensure safety and avoid damage․ Always use insulated tools to prevent electrical shocks․ A multimeter is crucial for testing voltage, current, and resistance․ Pliers, screwdrivers, and wrenches are common tools needed for wiring tasks․ Ensure all tools are in good condition and suitable for the specific job․ Never use damaged or worn-out tools, as they can increase the risk of accidents․ Additionally, keep tools organized and within reach to maintain focus while working․ For complex tasks, consider using specialized tools like wire strippers or crimping tools for precise connections․ Always test tools before use and store them properly after completion․ Consulting the owner’s manual for tool recommendations is highly advisable to ensure compatibility and safety․
6․2 Understanding Fuse and Circuit Breaker Systems
Fuse and circuit breaker systems are critical for protecting your electric scooter’s electrical components from overcurrent conditions․ Fuses act as safety devices that melt when excessive current flows, preventing damage to the wiring or components․ Circuit breakers serve a similar purpose but can be reset after tripping․ Always locate the fuse box or circuit breaker, typically found near the battery or controller, and ensure you understand their ratings․ Most scooters use 20 Amp fuses, but this can vary․ Never replace a blown fuse with one of a higher rating than specified in the manual, as this could lead to system overload․ Regularly inspect fuses for signs of wear or corrosion and replace them if necessary․ Understanding these systems helps prevent electrical fires and ensures safe, reliable operation of your scooter․
6․3 Preventing Short Circuits and Overheating
Preventing short circuits and overheating is essential for maintaining the integrity of your electric scooter’s electrical system․ Start by ensuring all wires are securely connected and free from damage or fraying․ Regularly inspect the wiring diagram to identify potential weak points․ Avoid overloading the scooter, as this can strain the electrical components and lead to overheating․ Keep vents and cooling systems clear of debris to ensure proper airflow․ Use the correct gauge of wire for connections to prevent resistance buildup, which can cause heat․ Additionally, avoid charging in wet conditions and ensure the battery is stored in a dry, cool place․ If you notice any unusual odors or excessive heat, disconnect the power source immediately․ Refer to your owner’s manual for specific guidelines on preventing electrical issues tailored to your scooter model․
Advanced Customization and Modifications
Advanced customization involves upgrading motors, controllers, and adding components like lights or sensors․ Use the wiring diagram to guide modifications, ensuring safety and optimal performance enhancements for your scooter․
7․1 Upgrading the Motor and Controller
Upgrading the motor and controller can significantly enhance your electric scooter’s performance․ Always refer to the wiring diagram to ensure compatibility and proper connections․ Start by disconnecting the battery to avoid electrical hazards․ Next, identify the current motor and controller specifications using the diagram․ Choose upgrades that match your scooter’s voltage system, such as a 36V or 48V setup․ Carefully remove the old components, following the diagram to avoid damaging wires․ Install the new motor and controller, ensuring secure connections․ Use the wiring diagram to verify all connections, such as the throttle, battery, and brakes․ Test the scooter at low speed to ensure everything functions correctly․ Proper installation and alignment are crucial for safety and efficiency․ Always consult the owner’s manual for specific guidelines and precautions during the upgrade process․
7․2 Installing Additional Electrical Components
Installing extra electrical components, like lights or a horn, can enhance your electric scooter’s functionality․ Begin by consulting the wiring diagram to locate suitable connection points․ Ensure the new components are compatible with your scooter’s voltage system, whether 36V or 48V․ Disconnect the battery before starting to prevent short circuits․ Use the diagram to identify the correct wires for power supply and grounding․ Connect the components securely, avoiding overloaded circuits․ Test each addition individually to confirm proper operation․ Refer to the owner’s manual for specific guidelines and safety precautions․ Proper installation ensures reliability and safety, while incorrect wiring can lead to malfunctions or hazards․ Always prioritize safety and consult professional help if unsure․ This ensures your scooter remains efficient and safe after modifications․
7․3 Custom Wiring for Enhanced Performance
Custom wiring can significantly enhance your electric scooter’s performance by optimizing power delivery and efficiency․ Start by studying the wiring diagram to identify key components like the motor, controller, and battery․ Upgrading the motor and controller can improve speed and torque, but ensure they are voltage-compatible․ Install high-quality wires to minimize resistance and heat buildup․ Adding components like a voltage booster or advanced throttle can further refine performance․ Always disconnect the battery before making modifications to avoid electrical shocks․ Use the wiring diagram to map out connections precisely, ensuring no overloaded circuits․ Test each modification incrementally to verify stability․ Refer to the owner’s manual for guidance, and consider consulting a professional if unsure․ Proper custom wiring can unlock your scooter’s full potential while maintaining safety and reliability․
Understanding and utilizing an electric scooter wiring diagram is essential for safe maintenance, troubleshooting, and customization․ Always refer to the owner’s manual for specific guidance and ensure all modifications are done safely and correctly․
8․1 Summary of Key Points
8․2 Encouragement for Further Learning
Exploring the world of electric scooter wiring diagrams is a rewarding journey for enthusiasts and owners alike․ To deepen your understanding, consider delving into online tutorials, repair manuals, and forums dedicated to e-scooter customization․ These resources often provide step-by-step guides and troubleshooting tips tailored to various models․ Additionally, experimenting with small DIY projects, such as upgrading components or adding accessories, can enhance your practical skills․ Continuous learning ensures you stay updated on safety protocols and best practices for maintaining and improving your scooter․ By investing time in these activities, you not only extend the lifespan of your scooter but also gain the confidence to tackle more complex modifications․ Remember, the owner’s manual is your foundation, but further exploration can unlock even greater possibilities for customization and performance optimization․
8․3 Importance of Referencing the Owner’s Manual
Referencing the owner’s manual is essential for understanding and working with your electric scooter’s wiring diagram․ It provides specific instructions tailored to your scooter’s model, ensuring safety and correctness when troubleshooting or customizing․ The manual outlines the manufacturer’s guidelines, which are crucial for maintaining warranty validity and preventing accidental damage․ By following the manual, you can identify components accurately and perform repairs confidently․ It also highlights critical safety precautions and diagnostic procedures, reducing the risk of electrical hazards․ Additionally, the manual serves as a legal and technical reference, ensuring compliance with local regulations․ For advanced users, it acts as a foundation for further customization․ Always prioritize consulting the owner’s manual before making any modifications to your scooter’s electrical system․ This practice not only safeguards your investment but also ensures optimal performance and longevity of your vehicle․ Regularly reviewing the manual keeps you informed about best practices and potential upgrades․
No Responses